TOOLS
I purchased all my aircraft metal-working tools from Avery Tools Inc. In Texas, USA. They are not cheap, but they delivered excellent service. Get them to send the tools to Vans who will then include them with your empennage consignment. Having only one consignment saves in freight costs.
|
NAME
|
IMAGE
|
USE
|
| Back-riveting set |  |
Back-riveting produces the best results with flush rivets. The manufactured head aligns with the flat (usually outside) surface hard up[ against a flat steel plate. The rivet set lies inside a collar which presses together the two sheets to be riveted. The rivet set repeatedly hits the manufactured head until the correct outcome is achieved. The resulting surface is normally smooth and well-aligned. |
| C-frame dimpling tool |  |
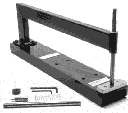
The rivet holes in skins need to be dimpled for flush riveting. This tool is wide enough to accommodate the 1/2 depth of all skins used in the RV range of kits. Complementary dimple dies are inserted in the vertical rod end and the base of the tool. The skin is fed into the tool until the dies are aligned with the hole to be dimpled. Care is needed to ensure everything is at right-angles to the skin. Three sharp smacks with my plastic hammer and the dimple shape is transfered precisely to the skin. This means that the shop head of a flush rivet fits snugly into the dimple, ready for shooting or squeezing. This is how RVs get their smooth outer skins |
| Cleco clamps | These use the spring-clamp principle of clecos, but they have flat parallel clamping surfaces. Used to clamp together flat items. | |
| Clecos |  |
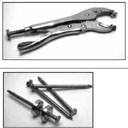
These have a spring and an expanding head. Normally the head is expanded, but squeezing the spring extends the center part of the cleco, collapsing the head. The pliers are used to squeeze the cleco, then you fit it though the holes and release. The head expands and holds (hopefully) the two sheets of metal together. Expect to get repetitive strain injury if you only use one hand to do this. I swap hands as much as possible, but it still hurts! |
| Micro-stop countersinking tool | Often it is necessary to produce a countersunk hole in a thick piece of plate, of exdact depth to fit a flush rivet or a dimpled sheet. These tools are finely adjustable to do this, using the countersinking bits. | |
| Bits for micro-stop countersinking tool |  |
These are the bits which fit the micro-stop countersinking tools above. You must ensure that there is NOTHING behind the work when you do this. The bits will not drill into a piece of chip-board, for example, used as a backing support. There needs to be a hole where the bit protrudes through the work. |
| Deburring tool | Newly drilled holes in sheet aluminium have sharp jagged edges (burrs). This tool fits into the hole and, when rotated, removes those burrs. Every hole you drill has to be carefully deburred. They tend to "chatter" and so I usually polish the hole by finishing with a quick rotation in the reverse direction | |
| Die-grinder (2500 RPM) | Expensive but absolutely necessary. 90psi drives this baby at 2500RPM. A small Scotchbrite wheel rotates and can be used to polish edges of skins etc, where the component cannot be applied to the larger wheel on a bench grinder. A drop of oil please before use. | |
| Dimpling dies |  |
These come in complementary pairs, each pair fitting one diameter hole/rivet size. They fit into the hand squeezer or the C-frame tool. The "male" part pokes into the hole to be dimpled. The squeezer, or C-frame tool, applies force to squeeze the two dies together with the sheet between. The result is a perfect dimple-shaped deformation of the skin which around the hole which should fit the manufactured head of a flush rivet of the correct diameter. |
| Edge deburring tools |  |
The Aluminium components have usually been punched or cut from stock sheet. The edges are consequently rough. These two tools are used to shave metal from the edges of thin sheet (top tool) or fropm the corners of thick sheet (bottom tool), prior to polishing with Scotchbrite wheels |
| Hand and pop-rivet style dimpling tools |  |
The C-frame and large hand squeezer tools cannot dimple holes close to narrow angles. You just can't fit the tool into where it needs to go. These tools are designed to be used in those narow situations. I have not used the pop-rivet style tool yet. I have used the hand tool, but found it did not produce a particularly clean dimple. If possible, I use the C-frame or the large squeezer. |
| Hand squeezer for rivets and dimpling | This toole gives heaps of leverage to produce dimples or squeeze rivets. The dimple dies or rivet heads fit into holes in the yoke. Don't try to squeeze it all it one go. Maximum mechanical advantage occurs when the tool is neary closed. I squeeze rivets in stages with this tool. | |
| Pop-riveting tool (quality) | You have to use pop-rivets in places. This tools is an excellent unit with a convenient rotating head. It doesn't matter which way the rivet faces, you can usually rotate the head so you still have access to the handles. | |
| Punches | These are mainly used to (carefully) lever out the remnants of drilled out rivets. Yes, some of them do not come up to spec and you have to replace them. | |
| Riveting Gun (3x) | Compressed air drives a cylinder producing a repetative striking of the rivet head by the rivet set. Set shape is concave for (convex) universal head rivets, and flat for flush rivets. A large slab of steel ("bucking bar" or "dolly") )is held against the other end of the rivet. The rivet is squeezed into shape by the hammering action. | |
| Guide to riveting jargon and standards |  |
This is a nice little chart fropm Avery's tool catalog, illustrating in section what I have mentioned about rivets above. For more detailed information, look at Dan Checkoway's excellent page on riveting, or go do an RV-builders' course. |
| Rivet shop head gauges |  |
Top - These gauges allow you to check that the driven ("manufactured") head of teh rivet has the right dimensions. If the rivet head fits within the little hole, it is not squashed enough and needs to be driven more to increase its diameter. If the rivet head fits under the little indent in the other end of the tool, you have gone too far, and it is too thin. Bottom gauges simply shows whether you have the right amount of rivet length protruding through the hole to produce a proper manufactured head. |
| Right-angle drill | I guess you use this in tight spots. So far I have not used it. | |
|
Seaming pliers
Fluting pliers |
 |
Seaming pliers enable you to grasp about three inches of sheet and bend it. Useful in returing flanges to a proper right angle before riveting webs into place. The fluting tool? Tough to describe.. When you punch out a piece of Aluminium with a complex curve (e.g. a rib the shape of an aerofoil)), and then bend a flange into it at right angles to the original plane of the sheet, you introduce a slight curve into the sheet. It's simple topology - try it with cardboard and you will see what I mean. With these pliers you can straighten the rib by making a number of evenly spaced slight crimps along the flange. This slight crimpling tends to reduce the longitudinal dimension of the flange and thereby pulls the rib back into shape. It actually works really well with practice. |
| Air drill (quality) | A fast, light air drill. Excellent for drilling out the pre-punched holes in components. Fast with only fine swarf formation. I am glad I spent the bucks for this tool. Remember a drop of oil in the air intake every time you use it. | |
| Unibit drill | Ostensibly you can "drill" at least 9 different hole sizes with this tool. Works really well in sheet aluminium. I use a slow drill speed and work carefully | |
| Flush head rivet set, self-aligning |  |
There is a ball joint between the flat conical set and the thin shaft inside the spring. So the tool always aligns flat with the surface. Excellent for flush riveting. Universal rivets use a concave narrower rivet set. With Universal rivets you MUST ensure you have enough pressure applied so the set will not jump off the rivet head, and return hitting it off-centre. This produces a "Smiley", so called because it looks like a smiley face (with no eyes). Been there.. Done that! |
| Wiss Aluminium Snips, RH & LH | These come in left and right hand versions. First time I used 'em I had the LH set in my right hand! Doesn't work. Used for manufacturing sheet articles. Clean and useful - would want to be at the price! | |
| * Images with permission from Avery's catalog - see www.averytools.com | ||